Natural materials in home decor have become increasingly trendy. Branches, with their organic shapes and textures, provide a distinct look that brings nature indoors. Whether you’re making a rustic centerpiece, a wall display, or accent pieces for your living room, carefully preserving branches is critical to ensure their beauty and durability. This complete article will show you how to preserve branches for decoration so they survive for years.
Why Preserve Branches for Decoration?
Branches add an organic and artistic touch to interior design, making them perfect for various projects such as:
- DIY home decor: Create centerpieces, wreaths, or wall art.
- Seasonal displays: Use branches for festive decorations during holidays.
- Rustic or minimalist style: Branches fit perfectly with natural, rustic, and minimalist themes.
However, without proper preservation, branches can deteriorate over time, leading to cracking, rotting, or insect infestations. By learning how to preserve branches correctly, you can prevent these issues and keep your decorations looking fresh and vibrant.
How to Preserve Branches for Decoration: A Step-by-Step Process
1. Choosing the Right Branches
The first step in preserving branches for decoration is selecting the right type of branches. Not all branches are suitable for preservation, and choosing healthy, durable wood is crucial for long-lasting results.
What to Look For:
- Healthy branches: Look for branches that are sturdy and free from rot, decay, or insect damage.
- Size and shape: Select branches that fit your desired project. Small, flexible branches work well for wreaths, while larger, thicker branches can make striking statement pieces.
- Fresh or recently fallen branches: Freshly cut branches are easier to work with as they still retain some moisture and are less brittle. Avoid branches that are too old or dry, as they can easily crack.
2. Cleaning and Preparing the Branches
Once you’ve selected your branches, it’s time to prepare them for preservation. Cleaning the branches thoroughly will remove any dirt, debris, or insects that could interfere with the preservation process.
Steps for Cleaning:
- Remove leaves and twigs: Strip off any leaves, smaller twigs, or unwanted growth using pruning shears or scissors. You want to keep the main structure of the branch.
- Brush off debris: Use a stiff brush to gently remove dirt, moss, or any loose bark. If there is stubborn grime, a damp cloth can help clean the surface.
- Inspect for insects: Check the branches carefully for signs of insects or nests. You may need to use insecticides or freeze the branches to eliminate any bugs.
3. Drying the Branches
Properly drying the branches is a critical step in preservation. Moisture trapped inside the wood can lead to mold, rot, or warping. There are a few different methods you can use to dry the branches effectively.
Methods for Drying:
- Air drying: This is the most natural and simple method. Place the branches in a well-ventilated area away from direct sunlight. Elevate them off the ground to allow air to circulate around them. Depending on the size of the branch and moisture content, air drying can take anywhere from two weeks to several months.
- Oven drying: For quicker results, you can dry smaller branches in an oven. Set the oven to a low temperature (around 150-200°F), and place the branches on a baking sheet. Keep an eye on them to ensure they don’t dry out too quickly, which can cause cracking. This method can take a few hours.
- Microwave drying: If you’re working with small, thin branches, you can use a microwave to dry them. Wrap the branch in a paper towel and microwave in short bursts of 30-60 seconds, checking after each burst. Be cautious as this method can cause the wood to heat unevenly.
Important Considerations:
- Avoid sunlight: Direct sunlight can cause the branches to dry too quickly, leading to cracks.
- Monitor progress: Check the branches regularly to ensure they are drying evenly and not cracking or warping.
4. Sealing and Treating the Branches
Once the branches are fully dried, it’s essential to seal and treat them to preserve their appearance and prevent decay. Sealing protects the branches from moisture, dust, and insects, helping them retain their natural beauty over time.
Common Sealing Methods:
- Polyurethane: Polyurethane is a durable and clear finish that provides a glossy or matte finish, depending on your preference. Apply one or two coats using a brush, allowing each coat to dry before applying the next. This is ideal for large decorative branches or those used in high-traffic areas.
- Wood wax: Wood wax is another option that adds a more natural, matte finish. It conditions the wood while protecting it from moisture. Apply a thin layer of wax and buff it into the surface using a soft cloth.
- Clear spray sealant: Spray sealants are easy to use and provide a light protective coating. They are great for smaller branches or delicate pieces where you want a subtle finish. Simply spray an even coat over the branch and let it dry.
Tip: When applying sealant, work in a well-ventilated area and wear gloves to protect your skin from chemicals.
5. Treating for Insects
Insects can be a problem when working with natural wood, especially if the branches were harvested from outside. Treating the branches for pests is crucial before bringing them indoors or using them for decoration.
Methods for Insect Treatment:
- Freezing: Place the branches in a sealed plastic bag and put them in a freezer for at least 48 hours. The cold will kill any insects or eggs present.
- Insecticides: Use a non-toxic insecticide spray to treat the branches if you’re concerned about bugs. Be sure to follow the instructions on the product label and allow the branches to dry completely before using them for decoration.
6. Using Preserved Branches in Decoration
Once your branches are preserved, there are countless ways to incorporate them into your home decor. Here are a few creative ideas for using preserved branches:
Home Decor Ideas:
- Centerpieces: Place a large branch in a vase or lay it across a dining table for a rustic, nature-inspired centerpiece.
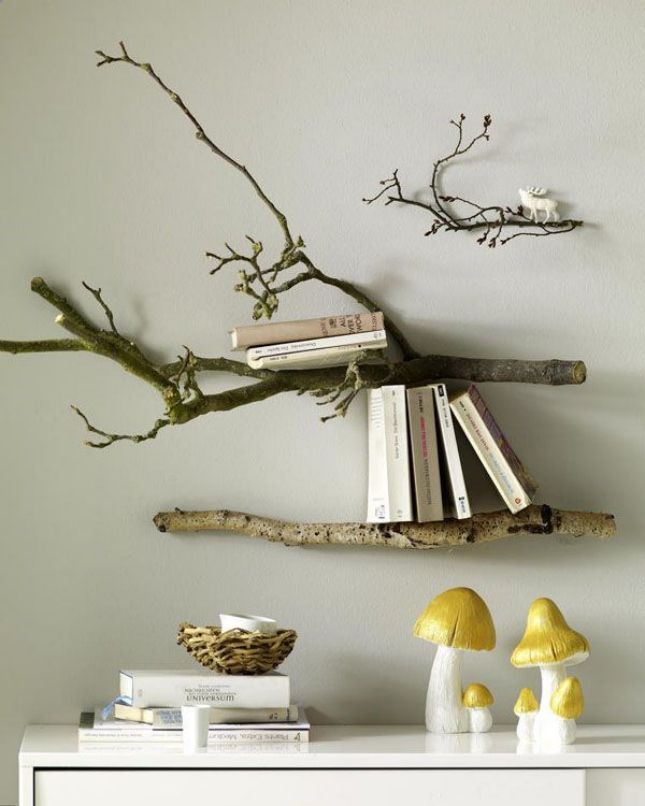
- Wall art: Mount branches on the wall as a natural sculpture or use them as a base for string lights, dried flowers, or other decorative elements.
- Seasonal wreaths: Use smaller branches to create a wreath. Add flowers, ribbons, or ornaments to match the season.
- Hanging decor: Suspend branches from the ceiling and hang decorative items like crystals, lights, or lanterns for a whimsical effect.
Design Tips:
- Combine with other materials: Pair your preserved branches with materials like stones, candles, or dried flowers to create a balanced and visually appealing arrangement.
- Use different textures: Play with the natural texture of the branch by combining it with soft fabrics, shiny metals, or smooth glass.
- Minimalist approach: For a clean, minimalist look, display a single branch in a simple vase or stand it alone in a corner as an art piece.
Long-Term Care for Preserved Branches
Even after you’ve completed the preservation process, it’s essential to care for your branches to ensure they stay in good condition.
Maintenance Tips:
- Keep indoors: Exposure to outdoor elements can cause the branches to degrade over time. Keep them indoors in a controlled environment.
- Dust regularly: Use a soft, dry cloth or feather duster to keep the branches free of dust.
- Avoid moisture: Keep branches away from areas with high humidity, as moisture can cause them to warp or rot.
Conclusion
Preserving branches for decoration is a rewarding way to bring nature into your home and create stunning, unique decor. By following the steps of selecting, cleaning, drying, and sealing your branches, you can ensure that they remain beautiful and functional for years to come. Whether you’re crafting a centerpiece, wreath, or wall display, properly preserved branches add a touch of rustic elegance to any space.
By taking the time to preserve your branches correctly, you can enjoy the beauty of nature indoors without the worry of deterioration or insect infestations.


